


Seriously, where has
this year gone? Just further proof that time-passing-as-a-series-of-Lorenz-transformations phenomenon is real. Well, it's either that or sorcery. Clearly. In any case, we
are long overdue for some new nomnoms and I've been saving up this recipe until
the weather cooled to the point that it wouldn't be torturous to have the oven
on. As it's been a few months, let's make the post a double nomnom feature!
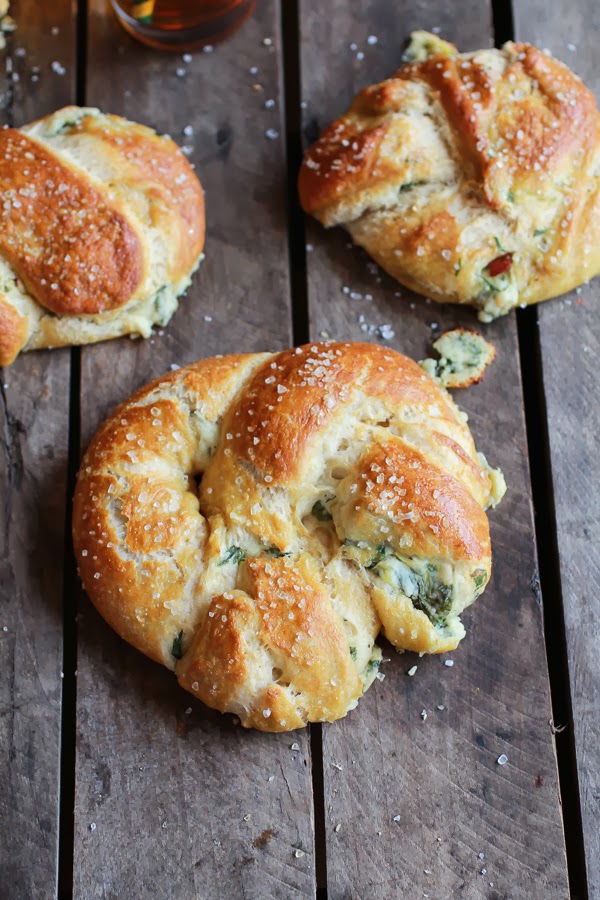
Below you'll find not one, but two different styles of stuffed soft pretzels!
 |
| Modified from the original recipe on Half Baked Harvest |
Until recently, yeasted
dough was my culinary kryptonite. It seemed that no matter how thoroughly I
prepared or how diligently I monitored times and temperatures I'd be left with
either something pungently fermented or depressingly lacking in anything
resembling volume. My crimes against eukaryote-kind would mark me as a
committer of mass fungicide for the rest of my days...or so I believed.
Like anything else, the
key was practice. While you don't necessarily need a great deal of experience
to make these pretzels, this is the single most difficult recipe that's been
featured on the blog to date. There's no doubt you guys can totally handle
this, but two things that will make your cooking experience easier even before
you get down with some flour and fungus are as follows:
- Read all of the procedural
and the Q&A first. This isn't a recipe you can follow along with as you go,
as too many of the steps need to happen either concurrently or immediately
after one another.
- If at all possible,
conscript a sous chef. Assembling the pretzels will be exponentially less
chaotic with another set of hands.
Difficulty: XCOM
Classic (very advanced)
Availability of
Ingredients: Somewhat common
Gadgetry: A
stand mixer with a dough hook (optional)
Feeds: 12-24
nerds
Time Till Noms:
2-3 hours, depending on the size of the pretzels you're making
Required Equipment:
2 large serving bowls, a whisk, a large wooden spoon or stiff spatula, 1-2
small heatproof containers (ceramic mugs work nicely), a large pot or deep pan,
several baking sheets, a frying pan, a rolling pin, plastic wrap, a slotted
spoon or spatula, a grater, a pastry brush or a soft, clean paintbrush
Optional Equipment:
A cooking thermometer, a citrus zester

Ingredients
For the pretzel dough (beer version)
2 cups whole wheat pastry flour
2 1/2 cups all-purpose flour
1 package active dry yeast (2 1/4 teaspoons)
2 tablespoons light brown sugar
4 ounces (1 stick) unsalted butter, melted and cooled
1 1/2 teaspoons sea salt or kosher salt
1/2 cups water
1 cup beer (or apple cider if you're making the sweet version of this)
Canola oil, ideally in spray form
3 quarts water, for boiling the pretzels
2/3 cups baking soda, for boiling the pretzels
1 egg, beaten, for brushing before baking
Coarse sea salt/kosher salt
For the filling (savory)
2 slices thick-cut bacon (optional)
1 tablespoon butter
1 clove garlic, minced, grated or smashed
1 tablespoon flour
1/2 cup milk
1 ounce cream cheese
1/2 cup shredded mozzarella cheese
1/2 cup grated parmesan cheese
1/2 cup greek yogurt
1/2 teaspoon crushed red pepper flakes (optional)
1/2 teaspoon pepper
1/2 cup (about 5 ounces) chopped spinach (can be fresh, but thaw if
using frozen)
1 (6.7 ounce) jar grilled artichoke hearts or you can sub marinated
artichokes, chopped
For the filling (sweet)
6-7 medium-sized apples
1/2 cup brown sugar
2 Tablespoons unsalted butter
the juice and zest of 1/2 of one lemon
1/4 teaspoon salt
1/4 teaspoon ground cinnamon
1/4 teaspoon ground nutmeg
1/8 teaspoon ground allspice
Making the dough
Step 1: Warm up the water to about 110-115
degrees (43.33-46.11 Celsius). This is well below the point at which it should
boil, but should feel readily warm to the touch. I put the water in the
microwave for 2 minutes on high, then let it stand at room temperature for
another two minutes.
Step 2: Whisk the brown sugar, yeast, and
water together in a bowl until the solids are dissolved (use the bowl of your stand
mixer if you're using one). Let this sit for 5 minutes. This sweet bath is what
activates the yeast.
Step 3: While your friendly symbiotes are
waking up, warm up the beer (or cider) using the same method as you did to warm
the water, then check the results of Step 2. When the yeast is ready, a bubbly
froth will appear on the surface of the water.
 |
| Frothy, bubbly, happy yeast...for now |
Step 4: Add the beer (cider), melted butter,
salt, and both types of flour to the yeast bath mixture and stir with your
spoon/spatula until everything is combined (low speed if you're using a stand
mixer). It's easiest to add the flour to the wet ingredients in small
increments of a 1/2 cup or less. If you're mixing by hand, it may take a little
while before the dough begins to comport itself. You could even try mixing with
your bare hands if you're so inclined! Increase to a medium speed if you're
using a stand mixer. The dough will look smooth and begin to pull away from the
sides of the bowl when it's ready (about
3 to 4 minutes with a mixer, 10-20 minutes if mixing by hand). If the dough
appears too wet (it will be very sticky if this is the case), you can add a
Tablespoon or two of flour.
 |
| It's the Final Countdown! |
Step 5: Coat a large serving bowl with canola oil (a quick spray
on all interior surfaces if using a spray). Remove the dough from your bowl,
place on a flat surface, then knead it into a ball with your hands before
placing the dough-ball into the bowl you just coated with oil. Cover the dough
and bowl with a clean towel or a length of plastic wrap and leave it in a warm
spot until the dough-ball doubles in size (apx. 1 hour). Begin the Yeast
Countdown Clock!
Making the filling (savory)
Begin this with about 15-20 minutes remaining on your Yeast Countdown
Clock.
Step Alpha: Warm your frying pan over a medium heat. While the
pan is warming up, chop your bacon into small (1/4 inch, 0.635cm) pieces. By
the time you finish chopping, the pan should be nice and warm. Cook the bacon
until it's crispy, rendering out all the fat, then scoop out the crunchy
goodness and set it aside on paper towel. Use the same frying pan, and the
delectable bacon fat, for the remaining steps.
Step Beta: (begin here if you're not using bacon) Using a medium
heat, melt the butter, then add the garlic. After 3-5 minutes the garlic bits
will begin to turn golden brown. When you see this, add in the flour and stir
to make a paste. Continue cooking and stirring for another minute or two, then
add the milk.
Step Gamma: Add cream
cheese, mozzarella, parmesan and pepper and stir until cheeses are completely melted.
Once this is done, stir in the greek yogurt and blend until the whole mixture
is smooth and uniform. After all these are mixed in, remove the pan from the
heat.
Step Delta: Chop up the
artichokes and spinach, then add these to the sauce. Return the pan to the heat
source, then (if you're using it) add the bacon and stir to combine.


Making the filling (sweet)
Begin this with about 45 minutes remaining on your Yeast Countdown
Clock.
Step Ά: Core and chop up the apples into
small (1/4 inch, 0.635cm or smaller) pieces. When you've almost finished
chopping, warm your frying pan over a medium heat and toss the butter into the
pan.
Step β: When the butter has melted and your apples are chopped,
transfer the apple pieces to the frying pan and stir them in the melted butter
for a few minutes until the fruit starts expressing some of its juice.
Step Γ: Add the salt, sugar, and spices, then continue stirring
for 5 minutes (the apples will start to soften and the peels will have paled in
color if you kept them on).
Step Δ: Add the lemon zest and juice, then turn off the heat and
let the mixture rest. It should start to thicken and get sticky as it cools.

Pretzels, assemble!
 |
| It's so fluffy! |
Step 6: Preheat the oven to 425 degrees (218.33 Celsius). Spray
or otherwise coat your baking sheets with canola oil.
Step 7: Remove your pretzel dough from its
bowl, then divide it into as many equal sections as you prefer (I got 24-30
fist-sized pretzels from this dough). Using
your rolling pin, roll each section of dough into a rectangle, stretching as
needed with your fingers.
Step 8: Spread about a Tablespoon of your
filling in a line along the center of your newly formed dough rectangles. Gently
fold the dough over the filling, then pinch the seams together. If possible,
give the dough a little roll along your prep surface to form an even cylinder
and fully enclose the filling.


Step 9: Here's the tricky part. Take the two
ends of each filled cylinder and cross them over one another to form into a
circle, then twist the overlapping ends and lay them onto the circle edge
closest to you in order to form a pretzel shape. Press the ends of the pretzel
gently to form a seal. Repeat on all your dough cylinders.
 |
| Or not bother and make little twists like I did |
Step 10: Bring your water to a boil in your
large pot/deep pan and slowly add the baking soda to the water as it comes to
temperature (it will fizz like the
carbonation in soda). Working carefully, boil the pretzels in the water/soda
solution 3-6 at a time for 30 seconds a batch, splashing the tops with the
warmed water using a spoon. Remove with a large flat slotted spatula or spoon.


Step 11: Place the boiled pretzels on your
greased baking sheets, then brush the tops with the egg wash and season
liberally with sea salt (or cinnamon and sugar if you're doing the sweet
version). Bake for 15 to 18 minutes or until pretzels are golden brown and
WOOT, you've finally got some stuffed soft pretzels!


FAQ
What's with the boiling? Can't I
just toss the pretzels in the oven once I've folded them?
You could, but then they really wouldn't be pretzels. The boiling
process is where we get the Maillard reaction which, in turn, is what gives
pretzels their distinct flavor and color. It's kind of unwieldy to do, but the boiling is
completely worth it in the end.
You didn't specify what kind of Greek yogurt/milk/apple! What do I
choose?
Pretty much any variety of those will work just
fine; the selection ultimately comes down to your preference. Feel free to
experiment with different fat contents in your milk/yogurt/cheese or any
variety of apple.
I don't have a cooking
thermometer. How do I ensure that I don't kill the yeast when I warm up the
water/beer/cider or add the melted butter?
If you're in doubt, give the liquid a touch test.
It should feel pleasantly warm (would make a warm, but suitable bath or shower).
As mentioned above, another trick is letting the liquid sit at room temperature
for the same amount of time that it was in your microwave.
Is it possible to let the dough
rise too much?
Yes, but you'd have to let it rise for a long time before it got to
that point. If the dough starts to smell more like beer than bread, pull it out
of the bowl.
Making the dough stresses me out!
Can I just use pre-made or frozen dough?
Definitely. Just follow the maker's instructions on
thawing/rising, then make your filling. The only drawback to using pre-made
dough is that it won't have the deep hoppy flavor or extra apple punch from the
beer/cider.
No comments :
Post a Comment