Cosplay: The Final Countdown

It’s the final countdown!


Sorry, I couldn’t use that line and not follow it up with Europe. The time until doors open at PAX East 2014 is now being measured in hours and, though there was an enormous flurry of activity that preceded this moment, we’re now in the period of acceptance. Whatever happens in the next few days will happen and very little will change that. Getting to this point is frequently the most stressful part of cosplaying as the last week or two before a convention is usually chock-full of critical construction, adjustments, and trials. It’s the make-or-break point for most costumes but, keeping a few things in mind, it doesn’t have to be a cavalcade of stress. The following are bits of advice I’ve cobbled together from several years of observational and anecdotal goodness.

Do: Try to have all your active construction done 72 hours before doors open.
Unless you’re one of those people who thrives on last-minute pressure, it’s a good idea to give yourself at least three days of buffer. Obviously, there are plenty of occasions where this just can’t happen, but it’s a good goal to strive for. Not only will doing this give you some wiggle room in case a portion of your costume ends up taking considerably longer than you thought, but you can still feasibly have components and materials delivered to you if you need them. Also, not having to pull all-nighters will almost assuredly make you a happier, more functional cosplayer.

Don’t: Test new cosmetics or prosthetics less than 48 hours before doors open.
If you have a reaction, the odds of it being resolved in time for the convention are slim. The ideal time to try out any makeup or prosthetics is two or more weeks before the con. At that point, your skin can recover from any irritation and, if there are any problems or something doesn’t work or appear as expected, you have plenty of time to find a replacement for the offending product.

Do: A few last-minute stress tests, but keep them small.
Just a few checks to ensure that everything is deploying/lighting up/coming together as it should can help you keep on-task so you can focus your energy on logistics and final preparations. Speaking of which…

Don’t: Forget about day-of logistics.
This seems a bit ridiculous, but it’s incredibly easy to let this less-than-fun facet of the convention experience go unconsidered. How are you getting to the convention? Can all the pieces of your costume can travel with you or do you need to ship them separately? Will you be dressing before you arrive or at the convention center itself? Are you bringing an emergency repair kit and, if so, will that be stored somewhere onsite or toted about? Does the convention's cosplay policies allow for all parts of your costume? There are few more effective ways to kill a cosplaying experience than the realization that your costume can’t actually make the trip with you. Taking a few minutes to mentally walk through the whens and hows of getting dressed and arriving at the convention center can save you numerous headaches in the not-so-distant future.

Do: Believe your Cosplay Lieutenant when they tell you that everything is fine.
We’ve extolled the virtues of having a Cosplay Lieutenant a few times now, and this is just one more reason why having a trusted individual take on this role can be so helpful. There comes a point during costume construction wherein various dour sentiments may try to sneak their way into your subconscious. These are the “This will never get done in time” or the “Ugh, this piece is coming out terribly” type thoughts, and they tend to crop up en masse in the last few weeks as the convention deadline looms large. Having an informed party appraise the situation can help you parse the legit criticisms from personal misgivings. The key to having this work out well is to trust your Lieutenant and actually believe them when they give you their opinion. On a similar, related note:

Don’t:  Shy away from making tough calls about your cosplay lineup.
No cosplayer is keen to admit that the project they’ve poured significant resources into isn’t turning out as planned or can’t be completed by the day of the convention, but these things happen. Again, having a trusted second or third (or fourth or fifth) opinion at your disposal can assist with this. It helps to have people on hand who aren’t afraid to ask if you really think you can finish the costume on time. Setting firm, specific checkpoints for yourself when you’re drafting your cosplay lineup can facilitate the decision-making process.

Do: Lay out your costume, badge, and other necessities the night before the convention.
Obviously this isn’t mandatory, but it can be immensely helpful when you’re bustling about just before doors open. This takes a measure of guesswork off the table as well so you’re not trying to parse out whether you’ve forgotten anything in a pre-caffeinated haze. Also, taking this step gives you another chance to go over the costume and the plan for the next day one more time.

Don’t: Get bogged down in the minutia if you have less than a week to go.
This is something I struggle with quite a bit and am only now, years after delving into this hobby, getting comfortable with the notion of “Will anyone really notice this?” When the inclusion of, and attention to, details plays such an enormous role in determining the overall quality of a costume, it can be incredibly easy to let those selfsame details gobble up a disproportionate amount of your time and energy. Once you get within a week of doors opening, taking a discerning look at what construction you have left to complete can go a long way to save your sanity. The distinction between something that would be nice to include (but would likely not be missed) and something that truly needs to be included is often not entirely clear. This is where the opinion of your Cosplay Lieutenant comes in handy if you find yourself at a loss. Otherwise, spend some time away from the costume, review your reference images, then return and ask yourself what parts of construction really remain outstanding.

Above all, keep your ultimate goal for your cosplaying experience in mind. The last few days before a convention can be very hectic and it’s easy to lose sight of why you set out on this sartorial odyssey to begin with. A quick little reminder that, “hey, I wanted to get better at sewing and now I have,” or, “learning to chainmail was so much fun,” or, “the convention tomorrow is going to be awesome” goes a long way in powering through those remaining hours. 


I’ll see you guys on the other side of PAX East 2014! Please hit up any of the social pages if you're headed there too!
Read More

This Week in Geekdom


Happy Sunday everyone. I write to you with paint and glue-covered hands on this last weekend day before PAX. If all goes according to plan, the sword will be 100% complete by the end of the day, ideally leaving me with an hour or so to do hair trials. This week's post will be a little on the short side as a result of this final push towards the finish line. Also, if anyone out there is headed to PAX next week and would like to say hi or hit up the board game hall, give a shout on one of the social media pages!

Science/Technology

2014 is shaping up to be a banner year for astrophysics. Scientists at the Fermi National Accelerator Lab have used existing measurements of the gamma radiation at the center of our galaxy to extract new clues as to the existence and perhaps even the origin of dark matter.

Image by NASA and the Univ. of Hawaii at Manoa
Space madness is one of those time-tested tropes of science fiction but, as we inch closer to a manned expedition to Mars, NASA attempts to gather information as to how an extraterrestrial existence may affect the psyche.  Check out their latest Mars simulation experiment here.

There was quite a bit of misinformation being tossed about this week, largely due to the fact that it was April Fool's Day on Tuesday, but one of the most persistent rumors told of a day that would feature a period of less gravity (during which we could all float around, freefall style). While that certainly isn't true, the Earth does actually contain areas that have 'missing' gravity. The Hudson Bay area of Canada is one such seismic anomaly. 

General Awesomeness

Yesterday marked the -49th anniversary of First Contact!

Treasure hunters rejoice! The New York Public Library has released this collection of 20,000 maps as hi-res viewable files for all to see.

Tardis-style police call boxes are making a comeback in the UK.

Robert Downey Jr. continues to win at life.

And, in honor of tonight's premiere of Season 4 of Game of Thrones, here are all 5,000+ character deaths that the show has featured thus far.


Best wishes for an excellent week ahead!
Read More

Cosplay: Forging the Sword

At this point, PAX is so close that the proximity is inducing all sorts of anticipatory grinning. Man, it has just been far too long since my last convention…

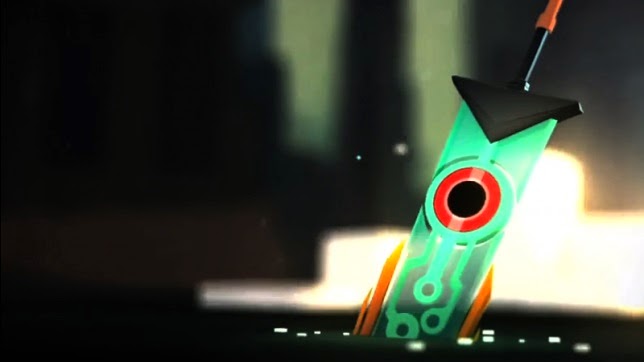
Creating the Red costume has been fun all-around, but creating the Transistor sword was especially enjoyable. Thermoplastics + careful alterations = awesome futuristic sword, and you can’t really go wrong with that. My inner 12-year-old squees every time I see it. Hell, were it not for the low-ish ceilings in our house, I’d probably play with the sword at every given moment.  

As the namesake of the game itself, it makes sense to put a little extra time and attention into the sword. While it’s not especially difficult to assemble, there are some potentially tricky components of the Transistor depending on the materials you decide to use. If you’re trying to closely replicate the source material, the blade of the Transistor needs to be at least translucent, though the trailer video depicts it as being mostly transparent.
Image courtesy of Supergiant Games
To achieve that transparency, I chose to make the blade itself from a length of plexiglass. Plexiglass won out over its acrylic siblings largely because it was more cost effective and could be shaped with tools I already owned. Another inherent appeal is the fact that you can order sheets of plexiglass in just about any shape or color you need. TAP Plastics and ePlastics both offer a wide variety of customizable options. Bonus: if you happen to be near a TAP Plastics brick-and-mortar location, they will shape your acrylic for a small fee.

Speaking of shaping your plexiglass, let’s dive right in and talk about how you go about doing that. Rule #1 of working with thermoplastics is always be mindful of the temperatures being applied. Every single incarnation of thermoplastic is flammable and has a high likelihood of warping/cracking/otherwise losing structural integrity when the heat turns up. In the case of plexiglass, that magical temperature threshold is 170 degrees Fahrenheit (76.67 degrees C).

Pssh, that’s a pretty high threshold Kel. Why would you need to worry about that?

Because friction. You know, that thing you’ll encounter while shaping or drilling your plexiglass.

Oh, right.

170 degrees creeps up pretty quickly once you start applying a fine edge. If at all possible, stagger your work with the plexiglass to accommodate pauses. I took advantage of this unending winter and set my tools out in our unheated sunroom to cool every 30-60 minutes or so. A quick touch or smell test will give you an idea of when to take a break. If the surface you’re working with is warm or you’re starting to get acrid whiffs of petrochemicals, you may want to focus your efforts elsewhere for a little while.

Wait wait wait. Let’s back up here. You’re talking about tools, but what should I be using to shape the plexiglass?

That will honestly depend on the thickness of your thermoplastic. For sheets that are 1/8” (0.32 cm) or thinner, you can shape with an Exacto or other very sharp utility knife. Simply draw your desired cuts on your surface, then score with your knife. Once you get about a third of the way through the plastic, a little pressure will cause it to snap exactly along your desired line. The video below provides more helpful hints. After this, polish the edges as needed with steel wool or very fine grit sandpaper (700 or finer). For plastic thicker than 1/8”, you will need to use saw blades that are explicitly designed for use with acrylics. Same goes for any drill bits you may want to employ, regardless of the thickness of your plastic. Most hardware stores sell both the blades and drill bits; just look for ‘for use with plastics/acrylics’ on the packaging.


After you have your plexiglass in your desired shape, it’s a matter of creating the hilt and decorating the blade itself. I made the base and hilt from sheets/dowels of birch board, which I cut to emulate the triangular shape in the reference images, then added bits of foamstock for the circular details and actual grip. Birch is great in that it’s strong, lightweight, inexpensive, easily shaped, and readily takes paint. Any standard acrylic will serve for the purposes of this prop. I mixed a gray we had left over from a bout of mini-painting with a basic black, then added a deep gray fabric paint that had a lustrous finish to it to give the impression of metal. It took about 3-4 coats of the mixture to get even coverage on the birch pieces and 2 coats for the foamstock.

Special note about using birch wood: for this project I purchased pieces of birch from a craft store, not a hardware store. Why? The wood that's usually up for sale in a craft store has been pre-treated for crafting (specifically for taking paint), whereas wood from a hardware store is usually in a fairly raw state. If you end up buying raw birch, you may have to spend extra time sanding and treating the wood before it's ok to apply paint. Michael's, AC Moore and most big-box crafting stores do sell birch board (usually in very manageable sizes), so I'd recommend buying from one of those if you're planning on using wood for the hilt/handle.

Drafting the design on the blade ended up taking the better part of about 6 hours, though if you’re less inclined to agonize over every curve and angle you could easily do so in about 2. Using the reference images, my T-square, and a random assortment of household objects that happened to have circular bottoms, I approximated the trademark forms in pencil. Another bonus to ordering plexiglass online is the fact that your plexi will arrive wrapped in protective papery covering. This will not only keep your acrylic pristine while you’re working with it, but can act as a custom stencil. Once I was satisfied with the look of the pattern, I carefully scored over the pencil with a very sharp utility knife, then peeled back the wrapping to reveal only the sections of the plexi that would be painted. You could just as easily use the stencil to etch into the plastic rather than paint, it’d just be a matter of personal preference. Acrylic paint tends to work well for this; just be sure to read the label to check that it will adhere to plastic. As plexi is inherently very smooth, you’ll likely need to apply 3-4 coats of paint to get even color coverage.

Once the designs had been painted, it was a matter of attaching the components of the hilt. As mentioned earlier, you can use a drill for this so long as the drill bit and screws are appropriate for use with thermoplastics (both TAP Plastics and ePlastics sell these if you’d like to spare yourself a trip to the hardware store). If you are using a drill, I highly recommend creating pilot holes for your join points. The last thing you want after carefully drafting, scoring, and painting/etching is to have the plexi crack or be otherwise compromised. If the notion of potentially cracking your thermoplastic is terrifying to you, there are a wide variety of industrial-strength adhesives that will work on acrylics and wood alike. Both crafting and hardware stores will carry these, just pay close attention to the “will work on the following surfaces” listing on the packaging. The one downside to using adhesives is that almost all of them are absurdly toxic. Be very, very careful when using them; always work in a well-ventilated area and follow all the manufacturer’s instructions to the letter.

A distinctly feline brand of 'help'
All that remains after this point are the “fins” that jut off to either side of the blade and any lighting elements that you may want to include. I used foamboard for the fins. It’s lightweight, cheap, takes paint well, and holds its shape with little-to-no added support. Foamstock ended up being the base for the vertically-aligned yellow ‘plug in’ stripes at the bottom and I used the absurdly toxic adhesive on both the foamboard and the foamstock (obviously, using hot glue on thermoplastic isn’t a good idea). I used very thin gauge floral wire to get the "fins" to appear as though one was floating parallel to the other the way it does in the game.

The Transistor itself pulsates with light when it converses with Red during the course of the game. If you're adhering to this portion of canon, then LEDs are your best bet. LEDs are perfect for this in that they are cheap, come in just about any size or shape you may want, can be battery powered, and, best of all, emit no tangible ambient heat. I bought a box of these, removed 6 blue ones from their respective plastic cases, then mounted the circuits into the hilt. If you're making a blade that's meant to be presented from only one side you can mount these directly onto the plastic. Operating the LEDs is as simple as flicking their switch.

I'm putting the last few touches on the sword and the rest of the costume with the intent that everything will be <this> close to done by Sunday. Ok, final stretch here we go!


Read More

This Week in Geekdom


We're getting so close. Tomorrow the countdown to PAX East will stand at a mere 10 days. While the costume is coming together quickly, progress has met with a few cat-related delays. Having never costumed with a kitteh before, the experience of receiving the uniquely feline brand of 'help' during the process was entirely novel. Related aside: Serenity-cat loves all things plastic and has formed a surprisingly strong attachment to the plexiglass base of the Transistor sword. We're not sure if this is some latent form of cat pica or if she really enjoyed her previous life as what we assume was a goat.

In any case, on to the week in geekdom!

Science/Technology

The single biggest tech story of the week was Facebook's acquisition of would-be virtual reality hardware-maker Oculus Rift for the tidy sum of $2 billion USD. The response to this purchase was nearly instantaneous and rippled across the interwebs from the epicenter of Oculus' original Kickstarter page. The creator of Minecraft reacted by nixing plans to bring the game to the Rift, but that's been the only official cancellation thus far. Will Facebook spell ruin for Oculus? It's anyone's guess at this point.
The potential successor to Would You Like to Play a Game of Chess?

 Any mention of advanced artificial intelligence is often paired with some iteration of the Turing Test, but the storied exam may only be one of several definitive gauges offered by the British mathematician. Behold Turning's less-well-known, but beautifully rendered, conclusions regarding natural pattern formation.


After three years of hibernation, the Philae lander has been reactivated in order to begin its next mission. What mission you say? How about landing on a comet.


Mozilla got a new CEO this week and not everyone was pleased by this news.


Artificial life is <that> much closer to becoming reality. Thursday's edition of the journal Science featured this story about the creation of the first wholly synthetic eukaryotic chromosome. 

Speaking of artificial life, researchers at MIT have created materials from synthetic sources that act like living surfaces.The so-called hybrid materials were based on the structure of E. coli bacteria and can do everything from emit light to conduct electricity.


This month's paradigm-affirming discovery of the gravitational waves stemming from what is believed to have been the Big Bang fostered fresh speculation concerning the possibility that our universe is but one of several in a lattice-style multiverse. How is that possible? Ethan Siegal explains.


The search for Malaysia Airlines flight MH370 has been at the forefront of global consciousness for the past four weeks. While the search for the plane has been frustrated by myriad factors, the science behind the hunt has gone unchanged for nearly two centuries.


Also in the realm of disturbing ongoing news stories is the Turkish government's crackdown on social media. This is the latest account of what's going down for Turkish users of Twitter and YouTube.

TV/Movies

After months of speculation, AMC has officially confirmed that they will be creating a companion series to the insanely successful tv version of Robert Kirkman's The Walking Dead. Details are sparse at this point, but AMC seems confident about a 2015 release date for the new show. Exciting news, but not nearly as anticipated as tonight's season finale.


Games

Curious about the Firefly MMO? Check out this interview with the CEO of Quantum Mechanix Interactive.


On Thursday, Nintendo confirmed that it would be amongst the other AAA publishers that would not be attending PAX East this year. The Wii-maker didn't offer any official reason as to their no-show.


Comics


General Awesomeness

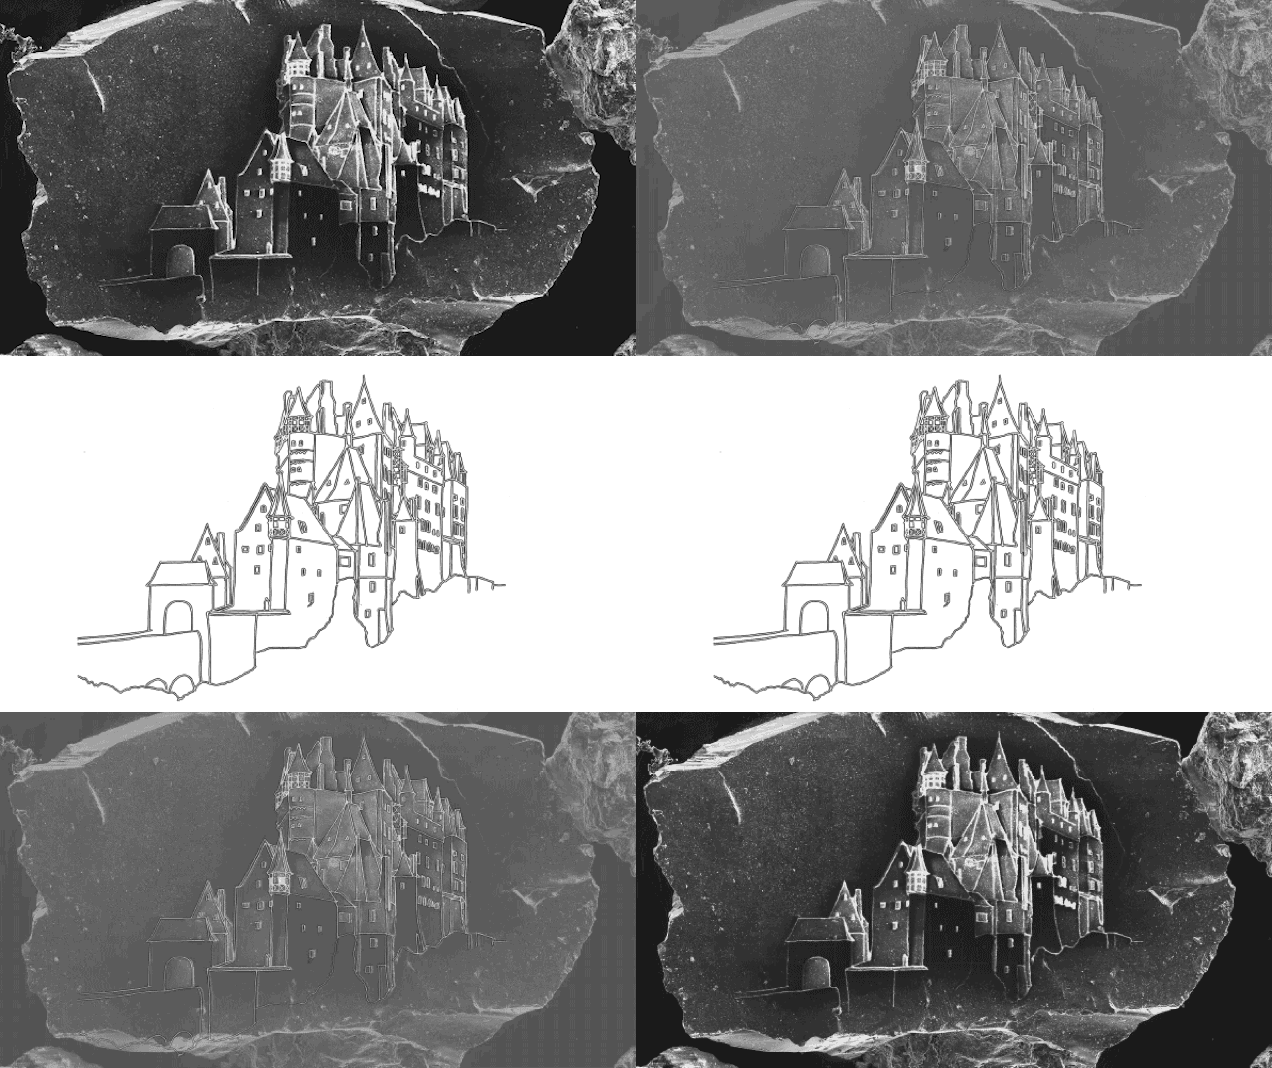
There's building a sand castle and then there's this. It took four years of trial and error, but the end result was ideal for the artist/researcher duo of Vik Muniz and Marcelo Coelho as they perfected the technique of engraving images onto single grains of sand. See the detailed account of their painstaking technique here.


Thursday was the birthday of one oh-so-handsome-and-charming captain. Happy belated birthday Nathan Fillion!


Add this to the Fan Generated Material That's Better Than The Real Thing file: the movie the Need for Speed re-created in Grand Theft Auto IV.
 
As always, best wishes for an excellent week ahead!
Read More